September 21, 2022
Guzman y Gomez Taquerias project
Read More
Surface Studio work with leading interior designers across Australia sharing expert tiling advice, information and related services. Contact us today regarding your next project.
Your ultimate guide to grout in one place, here are the top five things you should know about selecting grout:
What type of grout should I use?
Grout type will play a huge role in your tile’s lifespan, and different grout types will be appropriate for different applications, so let’s go over all your options:
Epoxy: Epoxy grouts are the most durable of all grout choices because they are resistant to stains and water damage and will hold up against harsh cleaners (please don’t use harsh acidic cleaners on our tile!). Epoxy grout is a great choice where moisture and food will be present, such as in bathroom installations, commercial kitchen settings and submerged applications like swimming pools. Epoxy grouts can yellow or fade on exterior applications. Be sure to check with your specific grout manufacturer about outdoor use.
Epoxy grout has two parts, the base, and the activator. When combined, a chemical reaction begins which means you have limited time to finish grouting before it sets and becomes too hard to work with. Therefore, we recommend hiring a professional when working with epoxy grout– it sets very fast giving you less wiggle room to work with your material should you need to adjust things. Epoxy grout is also the most expensive grout choice, however, it doesn’t need a sealer, which can save time and money in the long run.
The next two types of grout are cement based grouts– which are still the most popular and used the most often by professionals and DIY’ers.
Sanded: Sanded grout is a cement-based grout where sand is literally added into the mix. This sand creates a bond within the grout making it more resistant to cracking and shrinking and helps with slip resistance in wet areas. Sanded grout is most suitable for installations with grout lines wider than 3mm, like our handmade tile, terracottas or glazed thin brick, to help prevent shrinkage and cracking. Sanded grout sets slower than epoxy making it a great choice for handmade tile. It allows for more wiggle room during your install to adjust things.
Non-Sanded: Non-sanded grout is a cement-based grout used for smaller grout joints with spacing between 1.5mm and 3mm. If used in larger grout joints, a non-sanded grout may crack because of too much shrinkage and because of the lack of sand which creates a bonding effect. A non-sanded grout is easier to work with on vertical walls because of its adhesion properties and will stay put during application.
When and why should I seal my grout?
Sealing your grout is a must, especially in moisture-prone areas or when working with a light-coloured grout. The only type of grout that doesn’t need sealer is epoxy, which is inherently pre-sealed. Grout sealers typically come in two forms– spray-on sealers and applicator sealers. Applicator sealers are applied directly to the grout with a rollerball or a brush. Not as much precision is necessary with spray-on sealers, however, they require more clean-up later.
You will likely want to choose a penetrating grout sealer, which soaks through your materials creating an impenetrable barrier. There are also “Topical Sealers,” which form a layer on top of the tile and grout, however, these can become penetrable with age, and moisture can get trapped underneath, creating issues down the line. No matter which type of sealer you choose, always re-apply every few years to keep your tile looking its best.
Pro-Tip: A good idea is to always use a quality brand sealer such as AquaMix or DryTreat– You’ll have fewer complications if there are any warranty issues.
Which grout colour should I choose?
Selecting a grout colour can feel stressful, there are a lot of options, and the colour of your grout can significantly affect your overall design. Grout colour also has a huge impact on tile maintenance, for example, a darker grout will hide stains but can be prone to fading. It can also stain lighter coloured or crackle tiles so, therefore, we recommend applying a coat of sealer prior to grouting (we suggest first testing on a small area if you go this route), while a lighter grout will show stains and can be harder to keep clean. Colour is everything, so be sure to take your time.
There are three main directions you can go with grout colour:
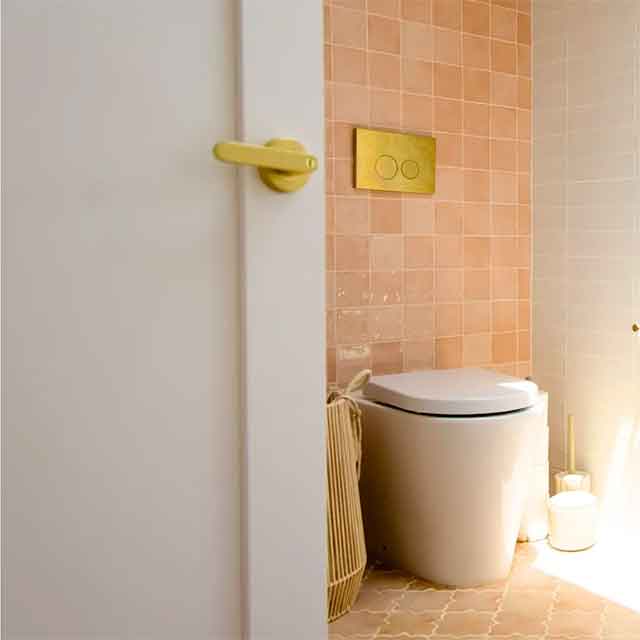
Matching: If you want your tile colour to be the centre of attention, we suggest matching your grout colour (or just get as close to it in tone if you have chosen a bright colour). This will prevent the eye from being distracted from the pattern found within the grout line. Not ready to go all in on pattern? We recommend selecting a matching grout so your pattern becomes more subtle in the space:
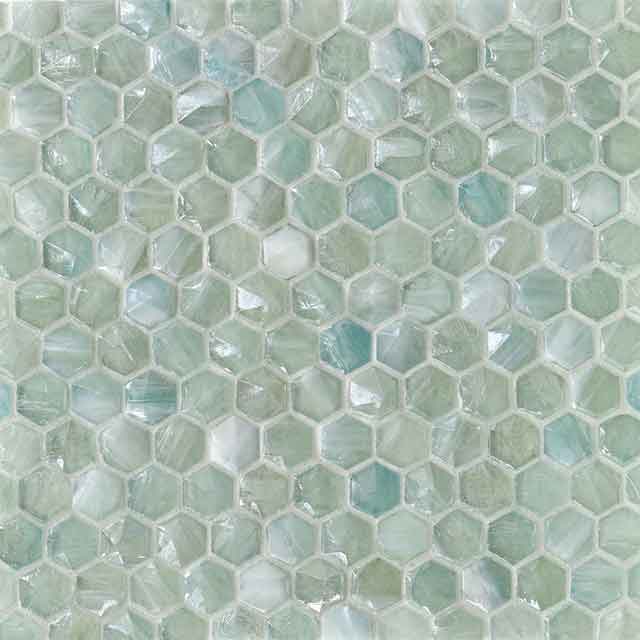
Contrasting: More of a bold type? Select a contrasting grout to highlight the pattern found in the layout and shape of your tile:
Pro-Tip: Be sure to test your grout against your tile if you choose a contrasting grout colour. Dark or pigmented grouts can stain your tile (keep scrolling to learn more about staining below!)
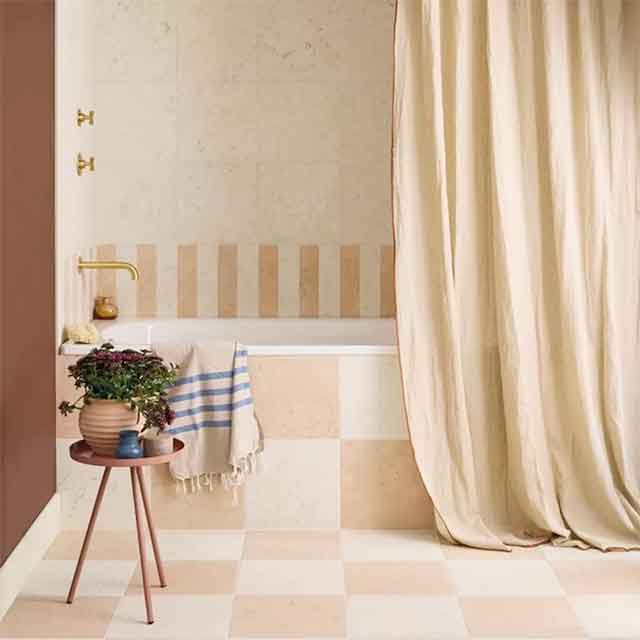
Neutral: A neutral grout is always a safe bet– it goes with everything so it’s hard to go wrong. The pattern will be more noticeable than a matching grout but not the main feature as seen with contrasting grout installations.
What is grout release, and do I need it?
Whenever you are using a dark or pigmented grout with a light coloured or crackle tile, there is always a chance of staining.
Pro-Tip: Using too much water to clean your install after grouting is the biggest blame for discoloured cement grouts after installation. Your sponges should be wrung out before washing the smeared grout off the tile.
A grout release is a removable, water-soluble surface coating that is used to protect the tile from staining when using pigmented grouts. It also makes grout clean up a little bit easier. You will always need grout release when you are applying a dark or contrasting colour grout to a light colour tile. This especially applies to glazes which have any sort of crackle or crazing. Grout release should also be used when applying a dark grout to our Handpainted designs that feature a light grey or white “dry line”.
What size grout joint is best?
When it comes to grout joints you should keep in mind that the tighter the grout joints, the more noticeable the size variation of any handmade tile/brick will become. Because a lot of our tiles are made by hand there can be a considerable amount of variation in size and thickness from tile to tile (we say it can fluctuate by ~3mm in any direction). With handmade tile, we always recommend larger grout joints to account for these irregularities. A very tight grout joint can make your installation look sloppy, which is why your tile installer may suggest a larger grout line for a straighter, more professional looking installation. Having more space between the tiles will trick your eyes into thinking the size is more uniform from piece to piece.
The size of your tile should also be considered when choosing a grout size. In general, there is more size variation in larger format handmade tiles.
Based on our products, here’s what we generally recommend for grout spacing:
5mm: We recommend a 5mm grout size for all of our concrete tiles, handmade ceramics and terracotta. This thickness leaves room for the natural variation in size, and the perfectly imperfect edges of the handmade tile.
10mm: 10mm grout space is the industry standard for glazed thin brick.
3mm: A 3mm grout space is the tightest we ever recommend installing floor tile, and it should be reserved for tiles with rectified edges. Rectifying tiles leads to less irregularity so less spacing is needed between each piece.
1.5mm: A 1.5mm grout space is all we ever recommend for wall tiles, and like floor tiles should be reserved for rectified tiles.
Pro-Tip: Where you are installing your tile should also be considered when choosing your grout size. For example, for floor installations in wet areas, you could consider using larger grout lines for more traction. Also, grout size should be considered when there is a difference in the angle of a surface. If your surface is not level, the grout will slope from one tile to another. You should keep in mind that when tiling over a corner, your grout joint will open and when tiling into a recess, the top of the grout joint will narrow.
Surface Studio recommends and stocks a huge selection of AquaMix, DryTreat, Laticrete & Mapei products, so all your tile needs are covered.
Have more questions about grout? Simply call us in the Studio.
READ OUR Articles